

To connect your Kodiak Max to a network, click the Network Settings icon on the main toolbar. This utility shows the current network state and a list of any available Wi-Fi networks.
To connect to a Wi-Fi network, select the desired network from the list, and click Connect. If a password is required, you will be prompted to enter it.
To connect to an Ethernet (wired) network, make sure that your Kodiak Max is physically connected to the network using a standard Ethernet cable.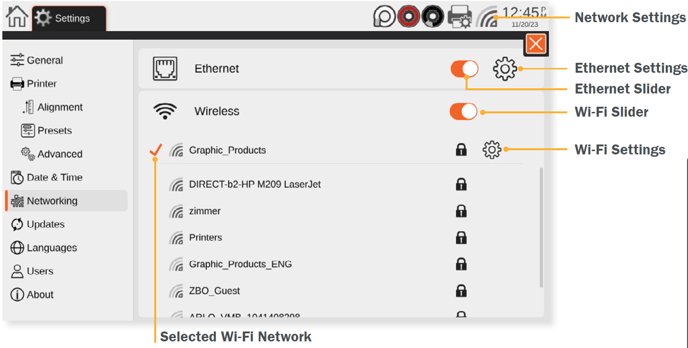
Ethernet Setup
The IP address on the printer will need to be set. This can be done onboard the Kodiak Max by first pressing the Home icon, then navigating to Settings > Networking > then select the gear icon next to the slider for Ethernet.
Next, set the option for Automatic to on (moving the slider to the right, shown as an orange slider) to automatically detect the network, or to off (moving the slider to the left, displayed as a gray slider) to manually input the network information. Once the information for the network has been inputted press Save, then turn the printer off for at least 10 seconds before powering back on
.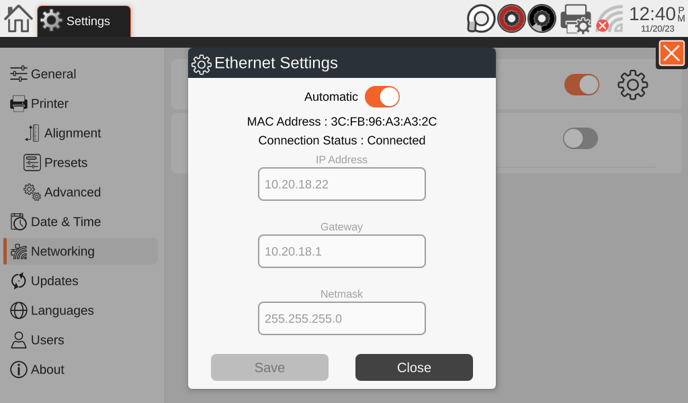
Once the printer boots back up, navigate to the Ethernet settings menu. This menu will display the IP address as well as Gateway and Netmask for the connected network. This step is not needed when manually entering the network’s information.
Connecting Kodiak Max to PC via Network
The following instructions will go over two options to print to the Kodiak Max over a network based connection using TCP/IP and IPP.
Installing Ethernet Max driver in Windows for TCP/IP (Transmission Control Protocol/Internet Protocol)
- Download the latest driver for your max printer from https://duralabel.com/support/printer-support/
- Install the driver via double clicking the installer.
▪ Navigate through the setup wizard, recommended settings will be already selected. - Once the driver install completes, it will prompt to restart. Make sure you restart before continuing to the next step.
- Now that you’ve restarted, navigate to Printers & Scanners in Windows.
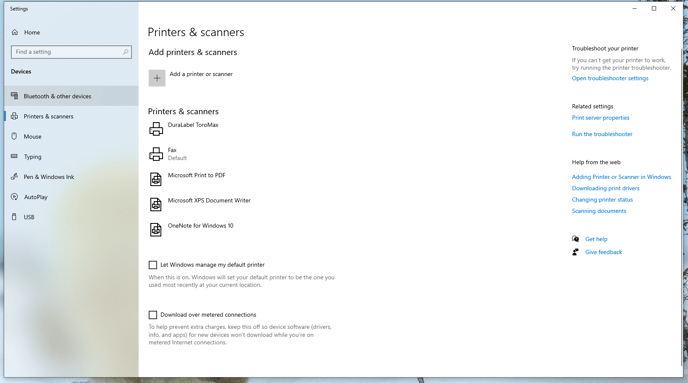
- Click the Add a printer or scanner at the top and wait until the following message comes up: “The printer that I want isn’t listed.”
- Click the “The printer that I want isn’t listed” message.
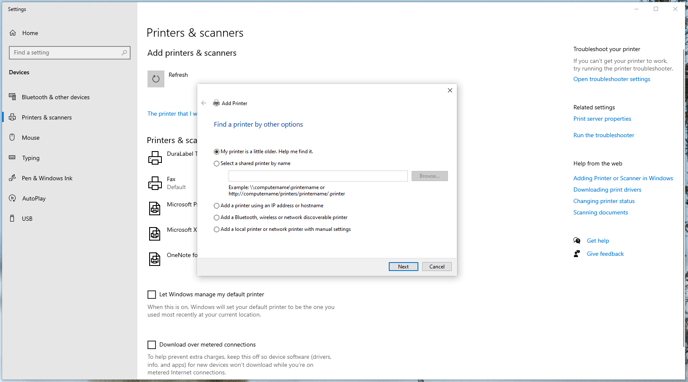
- Select the radio button “Add a printer using an IP address or hostname.” Click Next
- From the Device type, select TCP/IP Device.
- Type in the IP address assigned to your printer (done in the previous section setting up printers Ethernet connection), into the Hostname field. The port name field will also match this IP address.
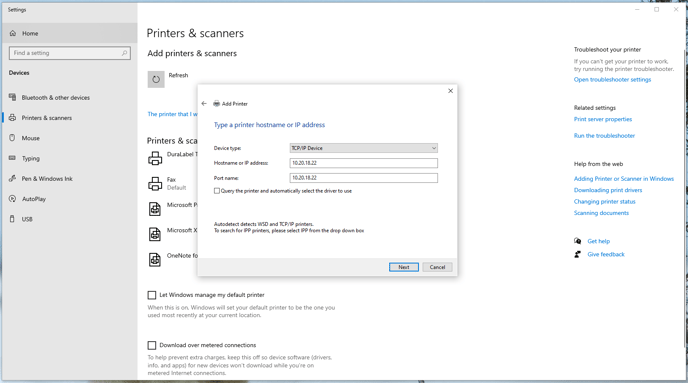
- Click Next
- Select Custom Radio button → and Click Settings button.
- Set both Port Name and Printer Name to the IP address for your printer.
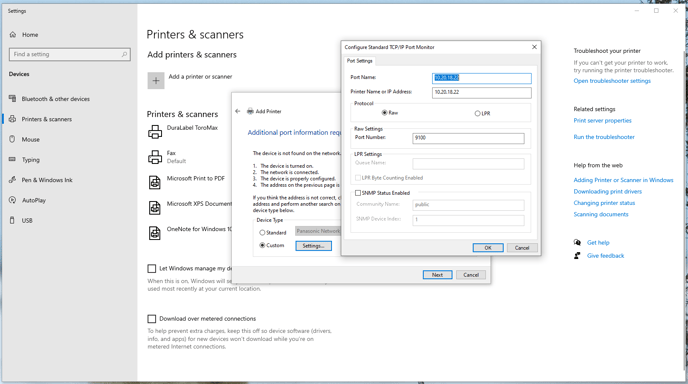
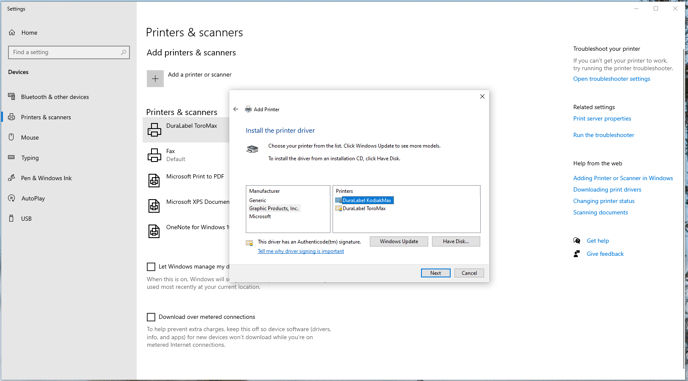
- Click OK → Click next. You should now be presented with a window to select the driver.
- Select Graphic Products Inc. under Manufacturer and your Max printer under Printers. Click Next
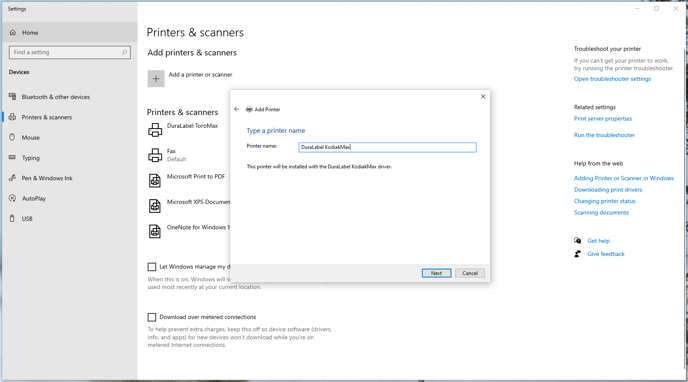
- You’ll now be presented with the option to give the printer a name. We recommend leaving this as the default. Click Next.
- Determine if you’ll be sharing the printer (Default is already set to Do not share this printer)
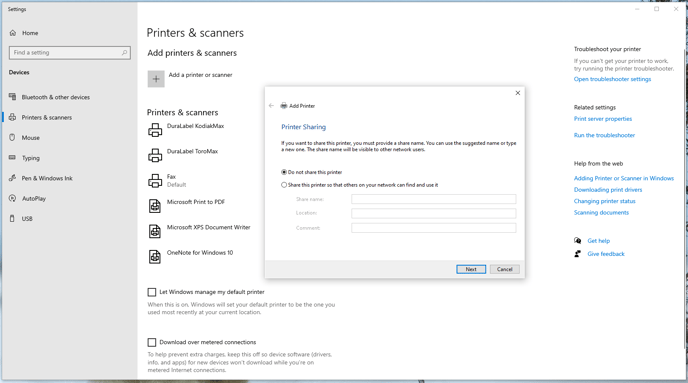
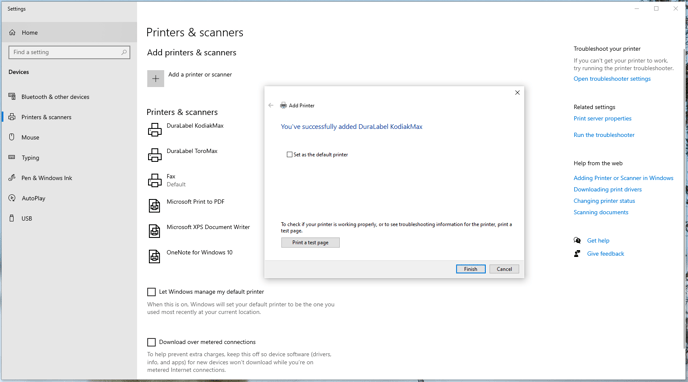
- Click Next → Finish. The printer should now show up under Printers and Scanners. The printer can now be used with LabelForge PRO. Supply information won’t be communicated to windows when setting it up as an Ethernet printer.
Installing Ethernet Max driver in Windows for IPP (Internet Printing Protocol)
- Confirm with your IT department that you have IPP enabled (This may be disabled due to IT policies). If you are unsure or your IT department doesn’t allow
IPP, follow the steps outlined in ‘Installing Ethernet Max driver in Windows for TCP/IP’ - Download the latest driver for your max printer from https://duralabel.com/support/printer-support/
- Install the driver via double clicking the installer. Navigate through the setup wizard, recommended settings will be already selected.
- Once the driver install completes, it will prompt to restart. Make sure you restart before continuing to the next step.
- Now that you’ve restarted, navigate to Printers & Scanners in Windows.
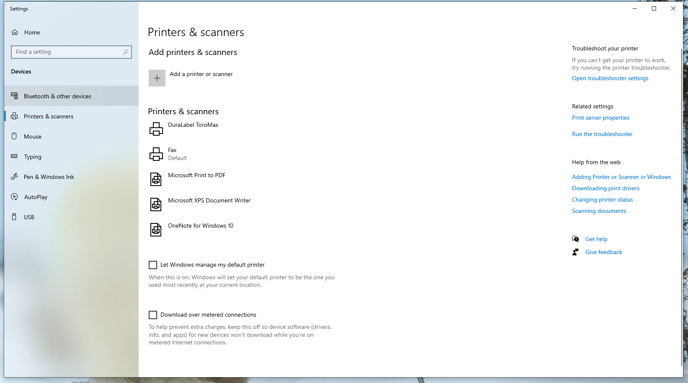
- Click the Add a printer or scanner at the top, and wait until the following message comes up: “The printer that I want isn’t listed”
- Click the “The printer that I want isn’t listed” message.

- Select the radio button “Select a shared printer by name.”
- Type into this field and replace IPADDRESS with the IP your machine has assigned to it (done in the previous section setting up printers Ethernet connection).
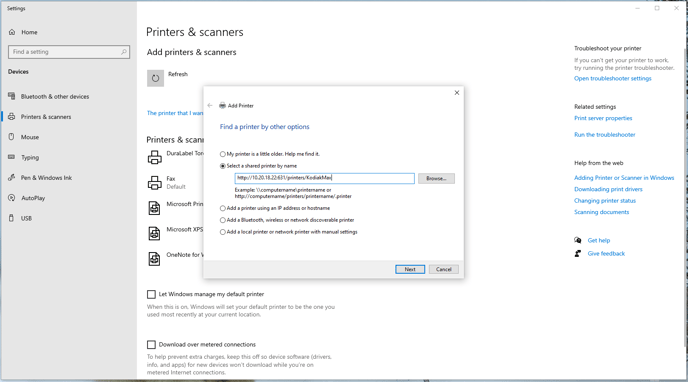
- Once you’ve got the field populated with the correct information. Click “Next”.
▪ This can take up to 2 minutes, while we wait for windows to communicate with the printer.
▪ If this fails, confirm your Ethernet settings on the printer and confirm the URL you typed in on the previous step.
▪ If it continues to fail move onto Installing Ethernet for TCP/IP section. - The printer should add successfully and present you with the following:
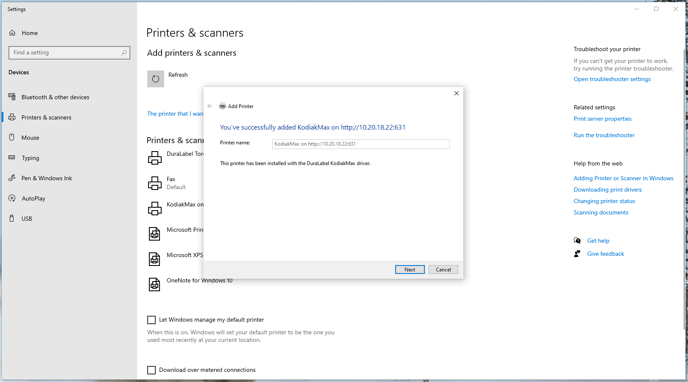
- Click Next, then Finish.
- The printer should now show up under Printers and Scanners
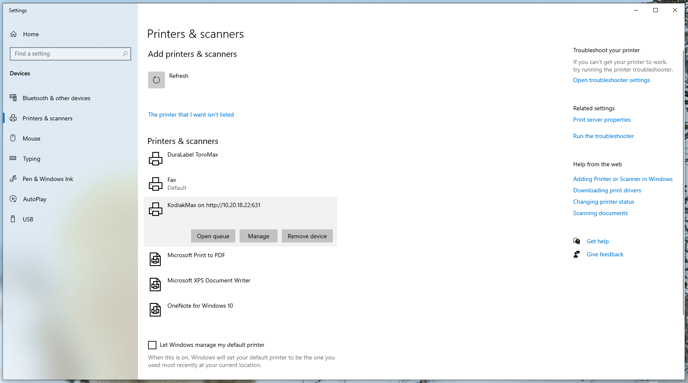
- The printer can now be used with LabelForge PRO. Supply information won’t be communicated to windows when setting it up as an Ethernet printer.
More Support Options
If you have any questions about using your DuraLabel Kodiak Max printer, get help from DuraLabel's world-class support team by calling 800-326-9244 or visiting DuraLabel.com.