
When printing from the Toro Max standalone printer or printing from the PC using the LabelForge Pro program with a Toro Max printer thse settings should adjust automatically based on the supply loaded when trying to print. If another program is being used when printing labels via PC the cutter settings will need to be adjusted prior to printing to ensure that it is cutting in the correct location without error.
Changing Settings Via Standalone
- From the home screen of the Toro Max, select and open the one of the Label modules.
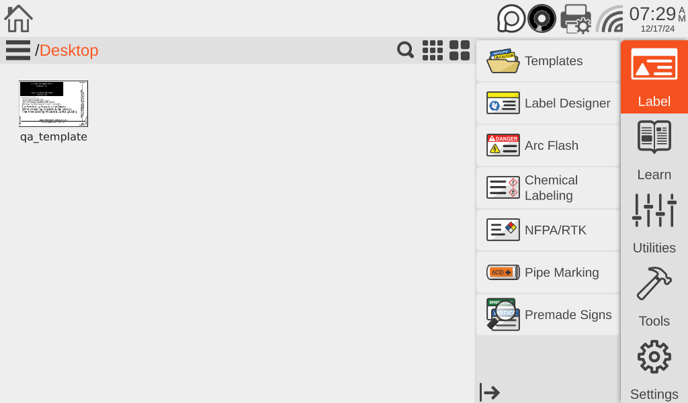
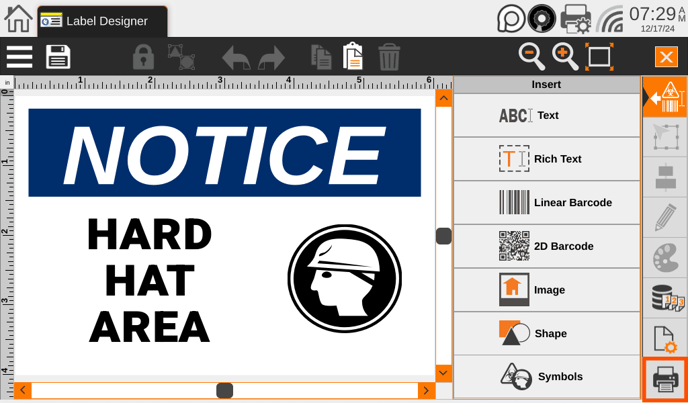
- Once the module is open, design or select the label as needed. Then, click on the printer icon that is in the lower right-hand corner of the application. For the example being used, Label Designer is the module that is being printed from. In every other module the print option will be locted in the same location.
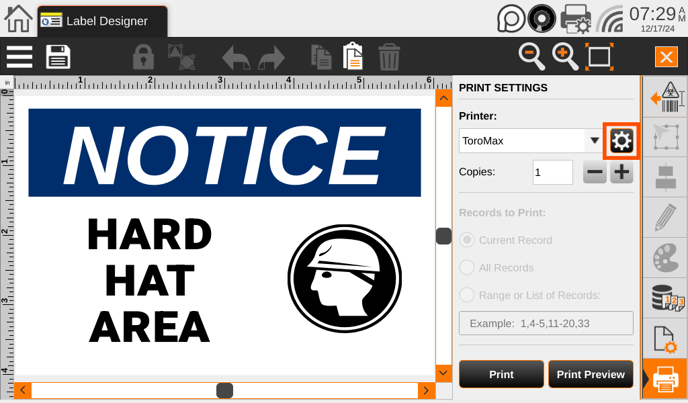
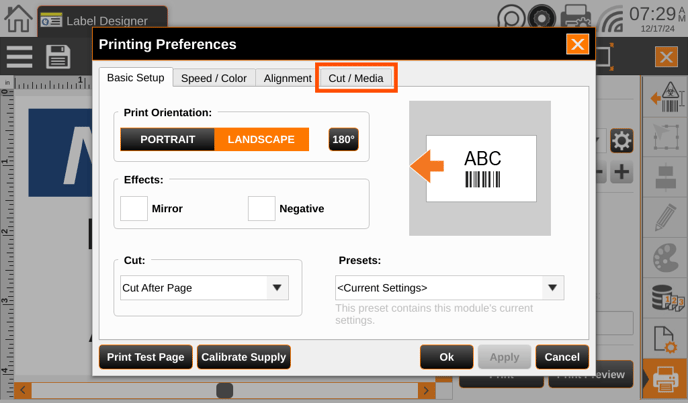
- From this menu there will be a gear button to the right of a printer selection drop down, click on the gear to open the printing preferences.
- In the Printing Preferences window that opens select the Cut/Media tab.
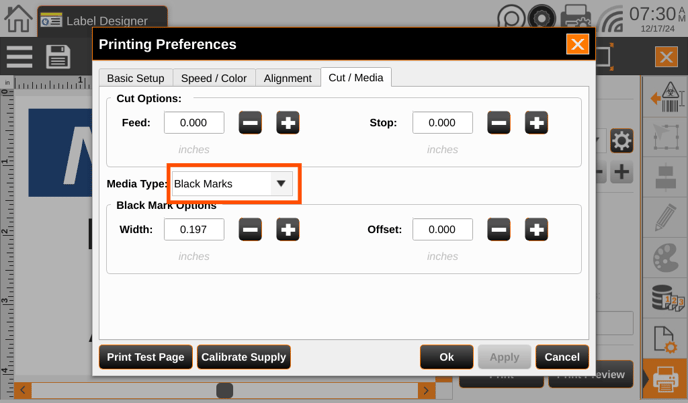
- Under this tab there will be a Media Type drop down. This drop down will tell the cutter and sensor what to look for based on the loaded supply. When using the standalone this should be set to the appropriate option by default, but for troubleshooting purposes this may need to be confirmed.
Changing Settings Via PC
- If printing from the PC make sure that the drivers have already been installed, if not please follow this guide that also includes a link to download the most up to date version of the drivers.
- After confirming that the drivers have been installed, navigate to the Printing Prefences by clicking the start icon and typing Control Panel. Then select the devices and printers option and within the new window that shows the drivers right-click on the Toro Max driver and select Printing Preferences.
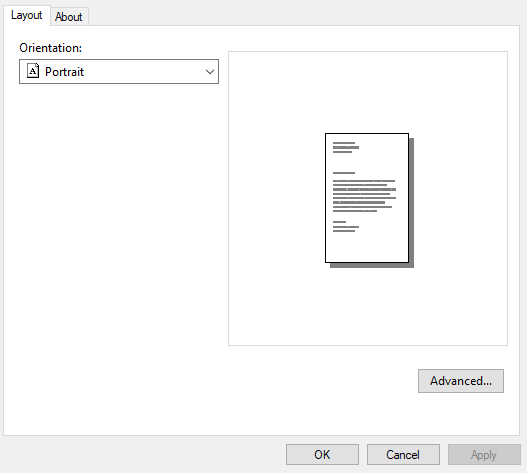
- In the new window that appears, make sure that the current tab selected along the top is Layout and then click the Advanced... button.
- Another window will appear, look for the Label Stock Format and adjust the value positively or negatively depending on the needs.
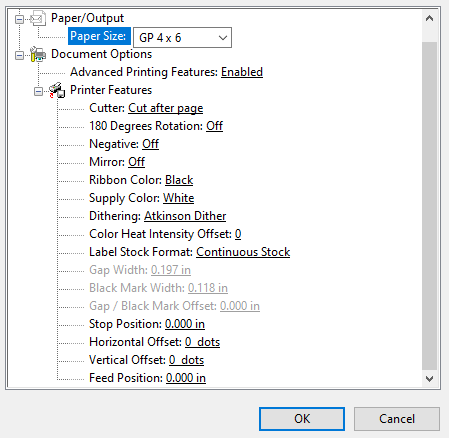
- Once the appropriate Label Stock opton has been selected, click OK, Apply, then OK to save the settings.
- If printing from LabelForge Pro the software will already make the appropriate changes, but when printing from a different software these changes will be neccesary to prevent errors or miscut labels.
- If any software was open to print labels from that will need to be closed and reopened for the changes to take effect.
More Support Options
If you have any questions about using your DuraLabel Toro Max printer, get help from our world-class DuraLabel support team by calling 800-788-5572 or visiting DuraLabel.com. We're here to help with all your labeling needs!